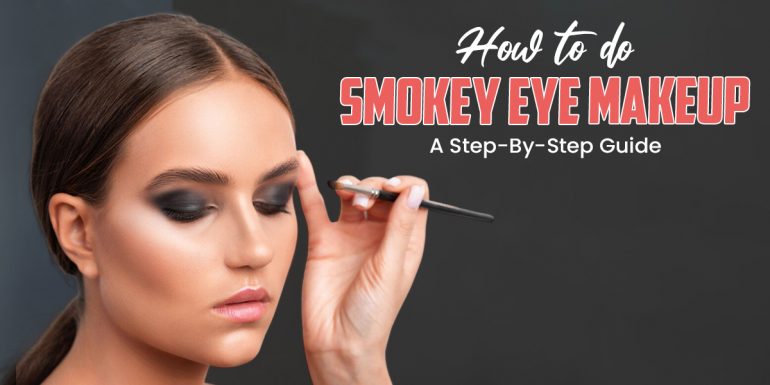
The allure of smokey makeup is timeless and captivating. Whether you’re heading out for a special night or simply want to add some drama to your everyday look, mastering the art of smokey makeup is a skill every makeup enthusiast should have in their repertoire. With the right tools and techniques, you can achieve a stunning, smoldering gaze that’s bound to turn heads.
In this step-by-step guide, we’ll take you through the process of creating the perfect smokey eye makeup, from prep to finish, so you can unleash your inner glam goddess.
A Step-By-Step Guide to Smokey Eye Makeup
Step 1: Gather Your Tools and Products
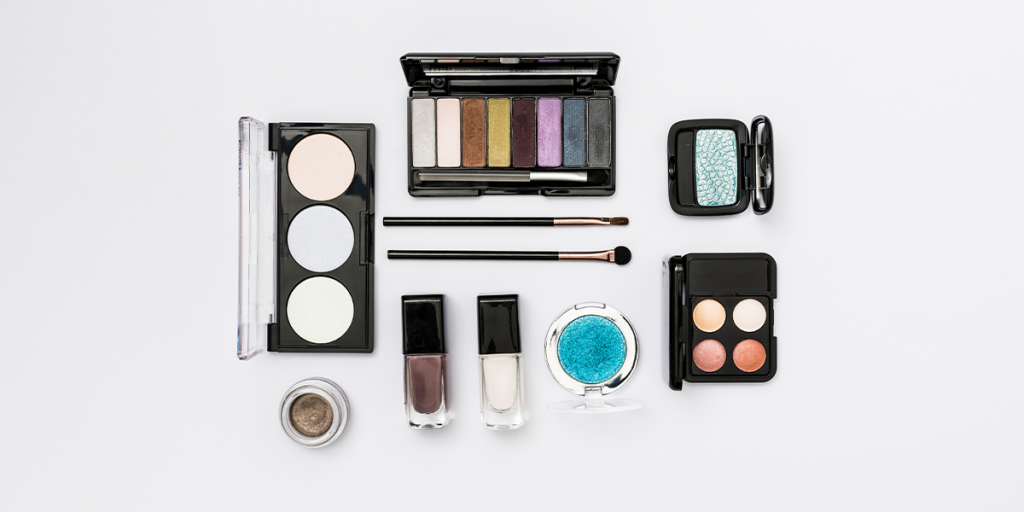
Before diving into the world of smokey eyes, it’s essential to have the right tools and products at your disposal. Here’s what you’ll need:
- Eyeshadow primer
- A palette of eyeshadows (neutral and dark shades)
- Eyeliner (pencil or gel)
- Mascara
- Eyeshadow brushes (blending, packing, and detailing)
- Cotton swabs and makeup remover (for cleanup)
- False eyelashes (optional)
- Lash glue (if using false lashes)
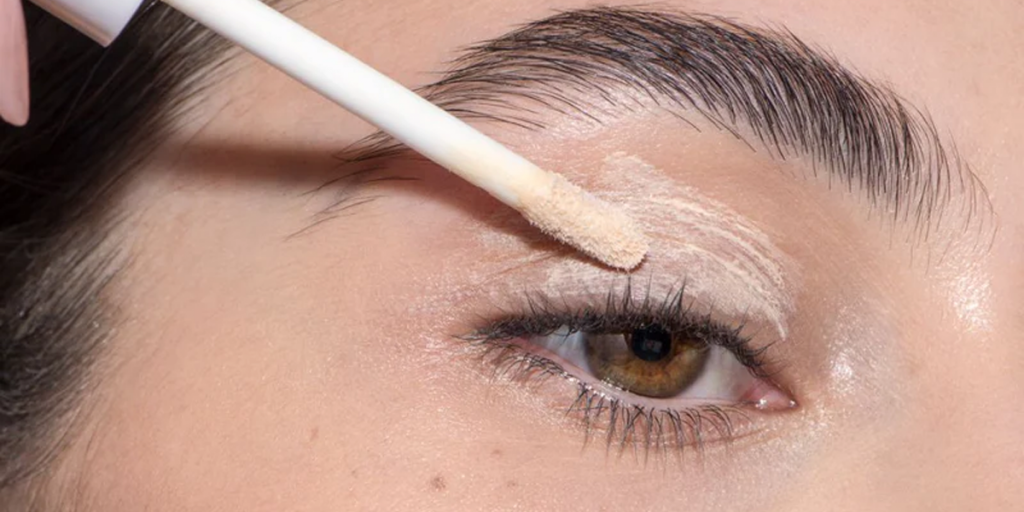
Step 2: Prep Your Canvas
A flawless makeup application starts with a well-prepped canvas. Begin by applying a small amount of eyeshadow primer to your eyelids. This not only helps your eyeshadow adhere better but also prevents creasing and ensures your smokey eye lasts all night. Gently blend the primer with your finger or a makeup brush.
Step 3: Build Your Base
For a classic smokey eye, you’ll want to start with a neutral base. Choose a light beige or taupe eyeshadow shade that closely matches your skin tone. Use a packing brush to apply this base shade all over your eyelid, from lash line to brow bone. This sets the stage for the deeper, smokier hues to come.
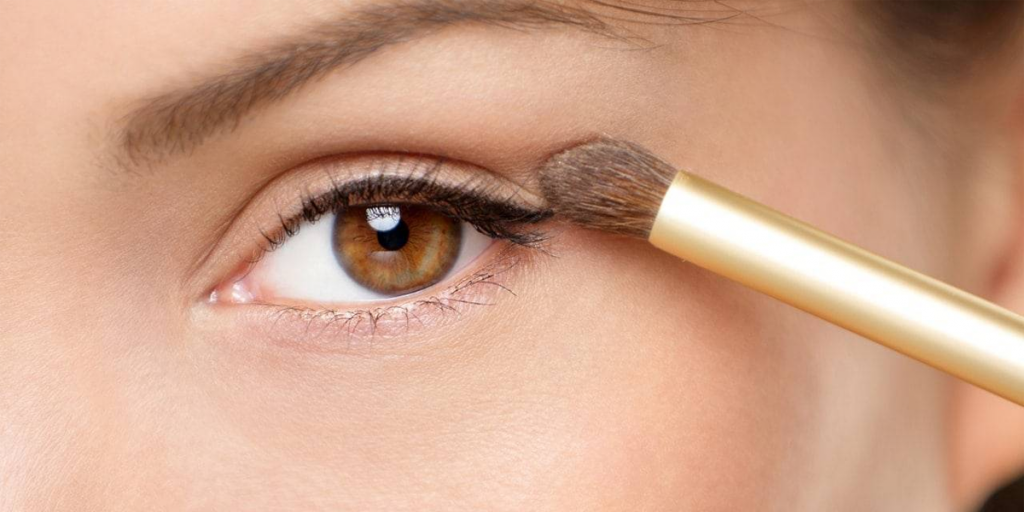
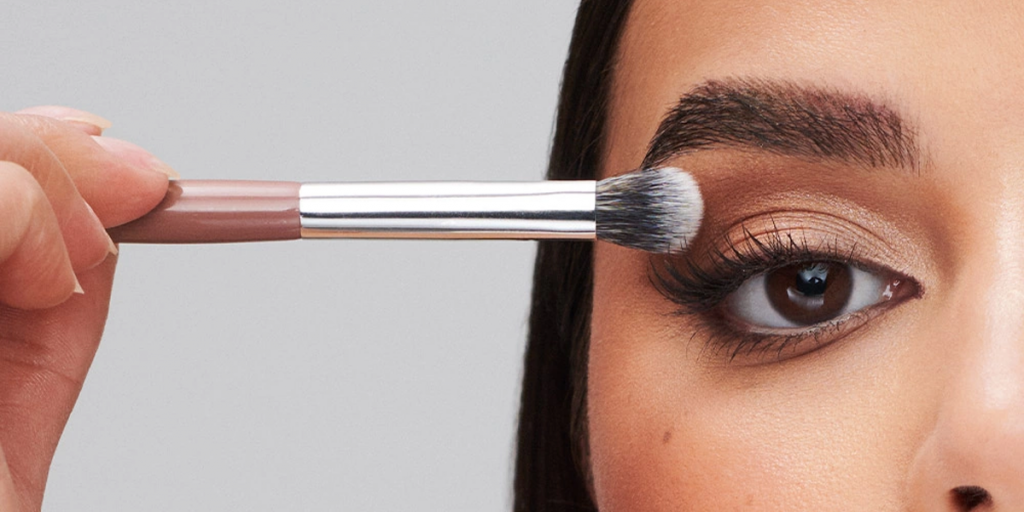
Step 4: Define Your Crease

Now, it’s time to create dimension. Select a medium-toned eyeshadow shade – think soft brown, muted plum, or deep gray – and use a blending brush to sweep it into your crease. Start at the outer corner and work your way inward with windshield-wiper motions. The goal is to create a gradual transition from light to dark.
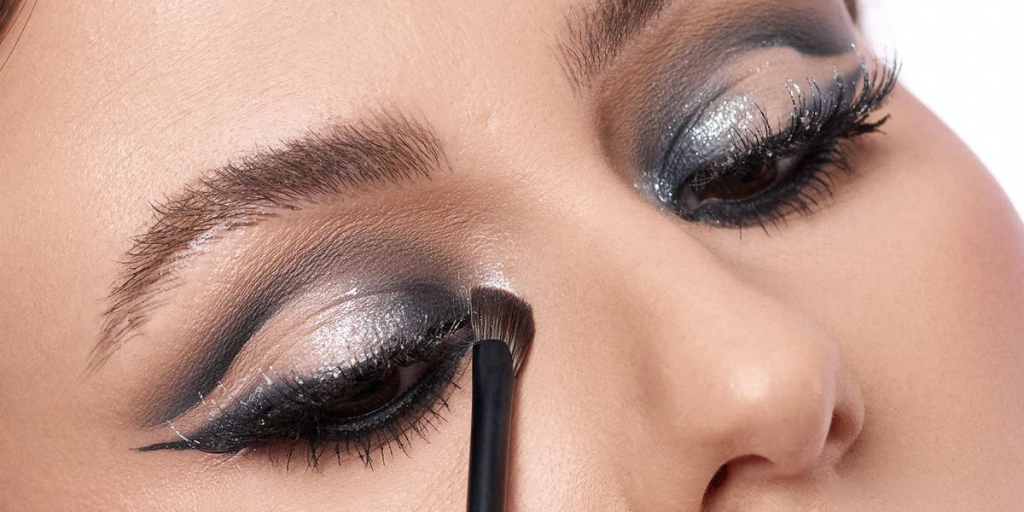
Step 5: Add Depth to the Outer Corner
For that signature smokey effect, you’ll want to darken the outer corner of your eye. Choose a dark, rich eyeshadow color, such as charcoal, black, or dark brown. With a smaller blending brush, apply the dark shade to the outer third of your eyelid, working it into the crease for a seamless blend. This step adds depth and intensity to your look.
Step 6: Blend, Blend, Blend
One of the keys to achieving a flawless smokey eye is impeccable blending. Use a clean blending brush to go over the crease area, making sure there are no harsh lines or uneven transitions between shades. A well-blended eyeshadow creates that smoldering, gradient effect.
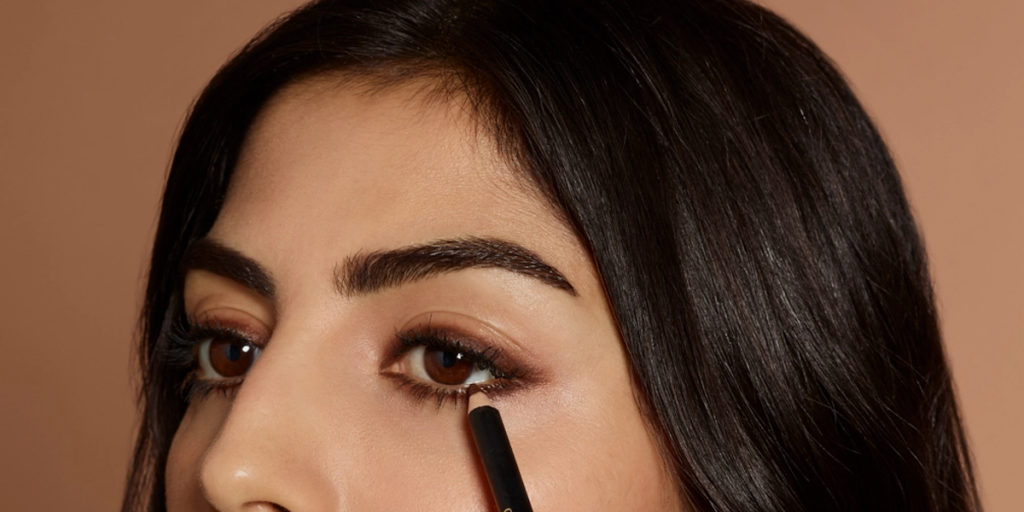
Step 7: Line Your Eyes
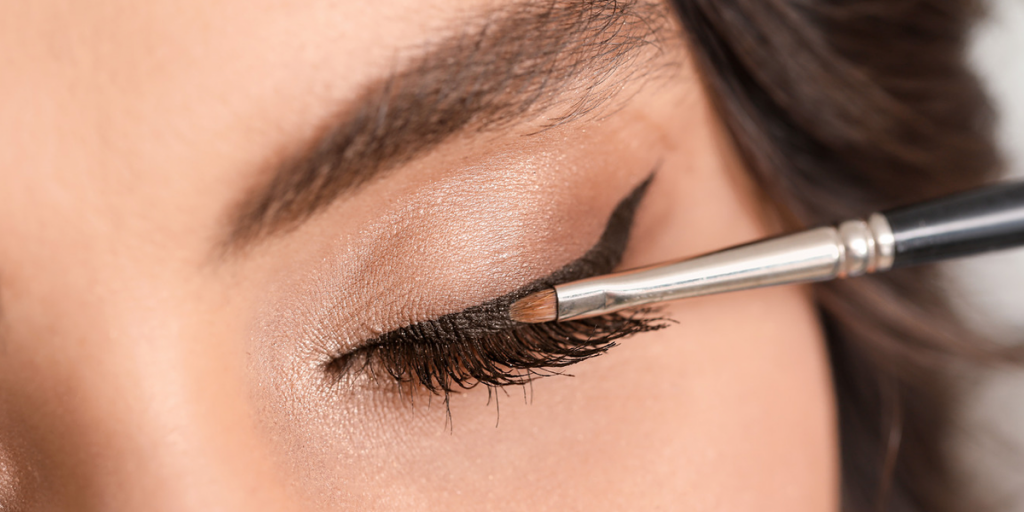
Now, it’s time to define your eyes further. Opt for a dark eyeliner – black or deep brown – and line your upper lash line. You can choose between a gel liner, pencil liner, or even eyeshadow applied with a fine brush for a smudged look. Extend the line slightly beyond the outer corner of your eye for a winged effect, if desired.
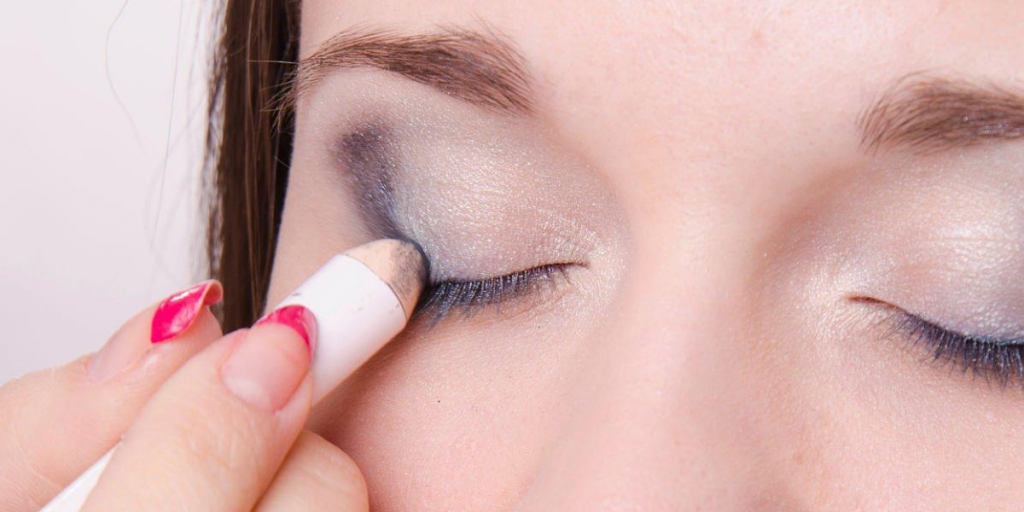
Step 8: Smoke Out the Lower Lash Line
To balance the top and bottom halves of your smokey eye, you’ll want to smoke out the lower lash line. Using a smudging brush or a pencil brush, apply the same dark eyeshadow shade you used in the outer corner to the lower lash line. Start from the outer corner and gradually blend it inward, stopping about two-thirds of the way.
Step 9: Highlight the Inner Corner and Brow Bone
To make your eyes pop, add a touch of brightness to the inner corners and brow bone. Choose a shimmery or matte eyeshadow that’s a shade or two lighter than your skin tone. Apply this highlighter with a small detailing brush to the inner corners and along your brow bone.
Step 10: Curl Your Lashes and Apply Mascara
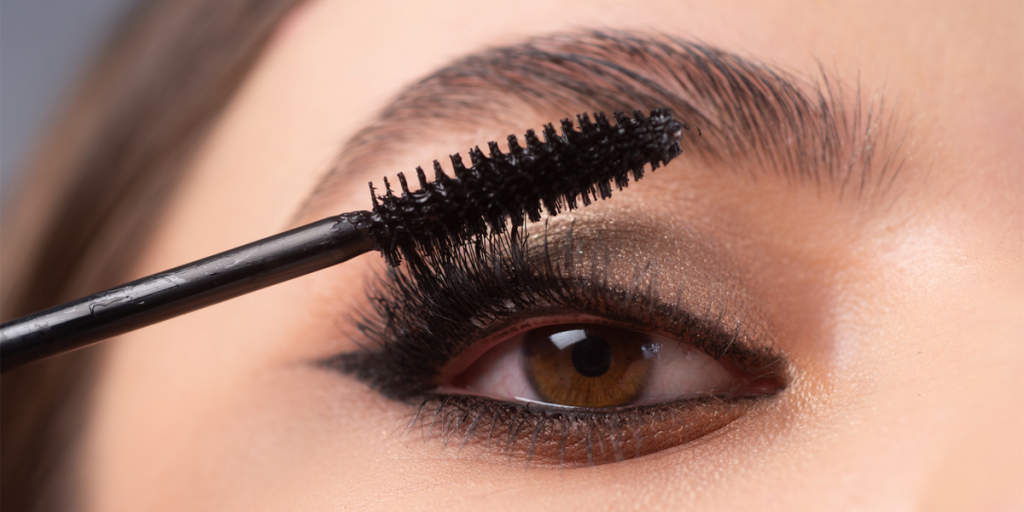
Before completing your smokey eye, give your lashes some love. Use an eyelash curler to lift and curl your lashes. Then, apply a generous coat of mascara to both your upper and lower lashes. For added drama, consider using volumizing or lengthening mascara, or even applying false lashes.
Step 11: Cleanup and Final Touches
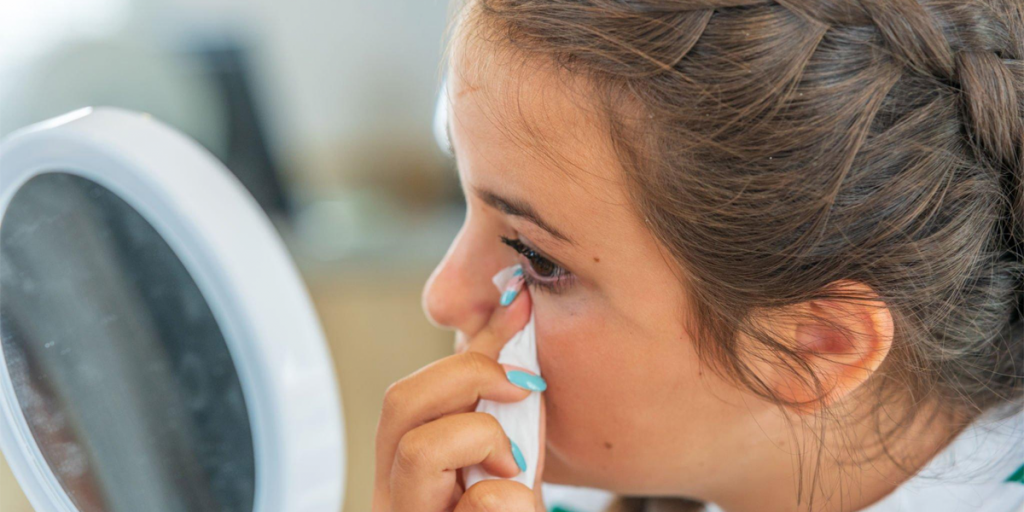
Smokey eye makeup can be messy, so it’s essential to clean up any fallout or smudges. Use a cotton swab dipped in makeup remover to tidy up the area around your eyes. If you’re wearing false lashes, ensure they are securely attached with lash glue.
Step 12: Rock Your Smokey Look
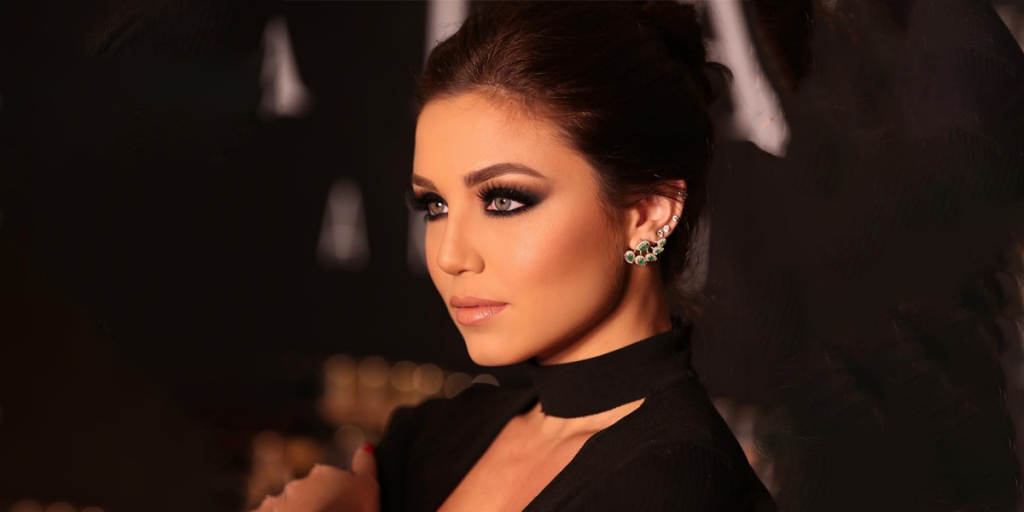
With your smokey eye complete, you’re ready to turn heads and make a statement. Whether you’re hitting the town or just stepping out for a special occasion, your sultry and sensational gaze will undoubtedly leave a lasting impression.
Key Takeaways Girls
The smokey eye look is a classic that never goes out of style. With a bit of practice and the right products, you can master this seductive makeup technique. Remember, makeup is an art, and like any art form, it takes time and experimentation to perfect. So, don’t be discouraged if your first attempt isn’t flawless – keep practicing, and soon you’ll be creating smokey eyes that are as stunning as they are captivating.